Tuesday, May 29, 2007

Making A Papier Mache Bowl

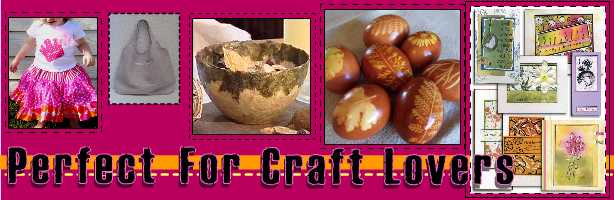
Papier-mâché takes on a whole new sophisticated look when you use handmade paper
=====================================


You will need:

  • Handmade paper/or any paper or tissue paper
  • A smooth, plain bowl
  • A second bowl or container
  • Petroleum jelly
  • PVA glue
  • A jug of water
  • A brush
  • A palette knife
  • Varnish
  • Kitchen roll

STEP BY STEP METHOD:

  1. Prepare the mould
    You'll need easy access to the whole surface area of your bowl so it's best if you can propel it somehow. A good way to do this is to turn a vase upside down and place the bowl face down on top.
    Smear petroleum jelly all over the outside of your bowl.
  2. Add the first layer of paper
    Rip your handmade paper into strips about one inch thick. Then rip each strip into smaller, square pieces. Keep going until you have a good pile of paper pieces.
    Your first layer of papier-mâché won't have any glue in it. Dip an individual piece of paper into the water jug and then stick it on to your bowl. Repeat until you've covered the whole outside of the bowl with a single layer of paper. Make sure that you don't leave any gaps.
    This first layer will be very wet so take a piece of kitchen roll and gently press it over the bowl to remove any excess moisture.
  3. Build up more layers
    Pour some PVA glue into the bottom of a container. Dilute with 10% water and mix together with a paintbrush.Paint each piece of handmade paper with the mixture before attaching it to your bowl. Add about 12 layers of papier-mâché in this way.
    Place in an airing cupboard to dry overnight.
  4. Decorate the edge
    Once your bowl has dried, tear up some paper in a contrasting colour and papier-mâché around the top edge of the bowl.
    Leave this to dry for around an hour.
  5. Remove the mould
    With a palette knife, carefully separate the papier-mâché from the bowl you used as a mould. Remove the mould and you should be left with a perfectly shaped papier-mâché bowl.
    Decorate the top edge of the inside of the bowl with another layer of the darker tissue paper.
  6. Varnish
    Paint the whole bowl with a coat or two of quick-drying water-based varnish. This should only take 20 minutes or so to dry after which, your bowl is ready to put on display.

========================================================


Check This site for More Details

Papier Mache Bowl

Here's a fun spring project you can make on your own. Papier mache bowls! All you need a favorite bowl covered with plastic wrap, tons of tissue paper scraps, glue, pressed flowers, paint, or anything else you want to add to your piece. I love the added addition of color and texture that the pressed flowers make
And also the pink bowl with sequins and beads.
HOW TO MAKE THIS PAPIER MACHE BOWL

Ingredients

  • 1 bowl covered with cling film/plastic food wrap
  • Lots of torn up tissue paper
  • PVA glue watered down 50/50
  • Pressed flowers.

Method:

  1. Cover bowl (clinged bowl/plastic wrapped) with lots of layers of tissue papers, with glue and leave to dry.
  2. When dry, take it out from the original bowl.
  3. Paint with acrylic paints if desired. Or leave it white - it will have a lovely translucency.
  4. Apply another layer of glue mix to the inside of your bowl, and decorate with pressed flowers.You can also scattered the dusty bits from the bottom of the bag of dried rosebuds, to give it a 'summer meadow' look.
  5. Alternatively, use coloured tissue paper and decorate with sequins/glitter/pretty threads/stickers or beads.
  6. Leave to dry, and then apply another couple of coats of glue inside and out.

************************************************

For more information Check this papier mache project

Magazine Bowls

METHOD:
1) Rip out magazine sheets that have lotsa colour in them, and colour that goes all the way to the edges cause that is what you will see.
2) Flip over the page you wish to use and start folding corner to corner. Figure out how wide you want your slats to be before beginning and try and make them all the same or else some will stick out.
3) Once you have folded it to the end glue the last flap over.
4) Then run glue along the finished slat and then start to roll, as tightly as you can to create your base. (As you go on DO NOT glue all slats together you want them to be able to move so you can bring the sides up to make the bowl shape.)
5) Now tape the end to keep it nice and tight.
----------------------------------------------------------------------------

ADDING MORE RINGS:
There has been som confusion on this point. The following pics look similar to the ones above but notice I am adding a second ring and you will add every additional ring in this way:The end of this slat is tapped to the base and then tightly wrapped around and then .....:taped again.

6) Continue to make slats and wrap them around the base. Alternate which sides you start to wrap around or else it will start to slant all to one side. After a while you should have a flat disc, once you reach your desired size (its kinda like pottery wheel in this sense!) push your thumbs in the middle and use your fingers to bring up the side of the bowl. When you have it looking the way you want cover the bowl inside and out with two layers of white school glue. As you know it dries clear and keeps your bowl hard and in its shape.

-------------------------------------------------------------------------------

Check for more Details from the original site

Decorative Eggs


Die Eggs with onion skins Blue Die Eggs


METHOD:
You place a pretty leaf or flower on a blown egg, (Learn how to make blown eggs quickly, carefully, and safely here below) cover it with a piece of thin stocking and secure it with a rubber band so that the leaf is pressed flat against the egg. Then suck some water into the egg so it doesn't float. Boil with onion skins for several minutes and you have a lovely brown egg with a leaf pattern on it. Rubbed the shells with olive oil to make them shiny but you can spray lacquer instead.


******************************************************


How To Blown Eggs
Blown eggs are a bit harder to make than hard boiled eggs and are more fragile, but do have some definite advantages. They last forever, do not need to be refrigerated, and are light enough to use in a variety of ways. The best way to blow eggs is to make two holes in each end with a needle, and then to widen one of the holes with a toothpick. Traditional directions say to just use a needle, but children (and most adults) found it impossible to blow the eggs with holes that small. You can used a cake tester to break the egg yolk in a few places, which made the process easier. Shake the egg very well to break the yolk and, standing over a sink or bowl, blow into the smaller hole with all your might. The egg white and yolk should drain from the bottom. Repeat the process until the egg is empty. Wash the egg well and set aside to dry.


******************************************************